Wednesday, June 30, 2010

Boat cooking: 1965-present

Scott and I have majorly simplified our eating in the past few months. Part of it was an experiment to see if 1) we could reduce our grocery budget 2) I could get healthier food down his gullet. Goal #1 was definitely met, mostly by not buying the pre-seasoned, easy cook noodles and rice type stuff. That crap costs a heck of a lot more than uncooked (uncanned) beans and rice! I think we've begun eating healthier on the whole, too, but I'm certain every nutritionist would shake his/her head at the amount of Ramen we eat. However, our Ramen almost always has veggies cooked in it (usually carrots, sometimes corn, and on rare occasion, peas). And we don't consume most of the broth. We've cut probably 3/4 of the meat we had been eating out of our diet, and filled much of that space with vegetables. On the whole, it has been a health gain.

I've even learned how to cook black beans in our hand-me-down pressure cooker from Mrs. G. First I asked for advice from Mrs. Moon, chef-extraordinaire. Then I read the Recipe Book before first using my new cooking apparatus, finding the giggles along the way. Along with cooking and cleaning instructions, other gems of informative text include:
In addition, every housewife is interested in the saving made through the reduction of cooking fuel costs... when using a Pressure Cooker. Inasmuch as foods cook in a fraction of the time usually required, naturally costs are greatly reduced.

(First, a grammar thing: why is there an ellipses after costs?) Grammar aside, I actually do care quite a lot about cooking fuel expenses. It has been my main motivation for obtaining such a thing.

The Recipe Book then goes on to explain:
Also, when preparing soups and stews, the housewife can be assured that all the health-giving vitamins and minerals contributed by each ingredient will be retained to the maximum degree.

I really do need to get myself a nice new apron to cook with this thing. I'd hate to mess my dress while making dinner every night! Be assured, also, that there will be no scurvy on this boat. Our vitamins will not get tossed overboard with the cooking water here!

It is a Presto Pressure Cooker, and the front cover or the Recipe Book proudly boasts that it was made in Eau Claire, WI, just a hop, skip and a jump from where I grew up, and merely a hop from where all my adult life was spent up until I moved to Seattle. However, I'm pretty sure I wasn't even born yet when this pressure cooker was actually being produced. The Recipe Book is copyright 1965.

I've gotta hand it to Mrs. G, this Pressure Cooker and Recipe Book are in dang good shape for being older than her children are! Here's a woman who takes care of her stuff!

The recipes inside the Recipe Book (I like typing Recipe Book, it's quaint) are deliciously midwestern: Brown Beef Soup, Porcupine Meatballs (yum), Fresh Tongue (yum, yum), Smoked Tongue (yum, yum, YUM, oh, but it doesn't say which animal's tongue... it does, however, give the weight the tongue should be: 3 lbs), Weiner Schnitzel, Norwegian Meatballs, Veal Birds (what's a Veal Bird?), Ham with Scalloped Potatoes, Pork Hocks with Sauerkraut and Potatoes, Economy Pork Steak, Meat Cabbage Rolls, German Potato Salad, Perch, and Brown Betty (I have no idea).

Now, jumping ahead a few decades, just this morning I came across a free e-cookbook, Stonesoup: Minimalist Home Cooking from one of the blogs I read. The recipes are easy, look very tasty, and also seem to take into mind my sensitivity to the amount of cooking fuel necessary for each recipe. Recipes here include: Simple Soba Soup, Shaved Fennel Salad with Snowpeas, Baby Spinach Salad with Couscous and Almonds, and Egg Fried Rice. Oh, and lots of other recipes, too.

If you're curious, go ahead, download it yourself. The pictures are pretty, too.

:)
Mandy

Monday, June 28, 2010

All in a very, very busy month's work

Without really realizing it, Scott and I have plowed through quite a few projects in the past month or so. I don't know exactly when these things all happened, or how they all got finished. I mean, I remember the messes they made, and the frustrations of many of them, but looking back, we did a pretty good job here. What amazes me more, is that we also managed to get a lot of regular business work done, including two more corporate classes, web programming updates, new web content, and regular students' scheduling. Though I teach the corporate classes, they take me a lot of prep time, and Scott needs to take over a lot of other things in the meantime, so these are very much a team effort!

Here is the project overview:
Hauled-out out the boat to
1) Paint the hull
2) Wax above the water line
3) Re-stuff the stuffing box

Then, continuing projects through the month:
4) Added the new faucet, which is now perfectly drip-free, and beautiful and functional in every way

5) Repaired and repainted the muffler

6) Added a barrel bolt to the head cabinet doors

7) Added an l-brace to the base of the head door frame to keep it in place (no more whacking the frame to be able to close the head door, woo-hoo!)

8) Refinished the teak cabinet doors in the head, the head door, and the head door frame back to its sensual, velvety-soft, clean, unblemished, like-new teak state (I am now more in love with teak than ever!) Also: this is known as the while-you're-at-it project, since it only happened because wood refinishing should get done before adding the new hardware (the barrel-bolt).

9) Cleaned up and polished all the hardware of the head cabinet doors and main head door (This was the while-you're-at-it project of refinishing the teak, since it is easier to refinish with hardware removed, since it's off anyway...)

10) Added heat-shrink tubing to the end of the ladder hooks so they stop squeaking whenever a foot touches the floor anywhere near the ladder. Ingenious, if I do say so myself...

11) Rewired the stern light and binnacle light

12) Added blocking to the empty space behind the quarter berth to install (removable) netting for additional storage of light, yet bulky objects that we don't need very often.

13) Added a basket to the backside of the galley door for soap/sponge storage

This isn't even counting things like general organizational improvements, entertaining some friends on the boat, cleaning (SCRUBBING) the bilge, and starting sewing on the bimini repair. We've been busy!

Yes, we certainly had help from Scott's folks and our friend Maxx. Many of these projects would NOT have been possible without their invaluable help, and we thank you all thoroughly! Mr. G, thanks also for the teak-refinishing tutoring on the sofa... I would have really messed things up without all the pre-project advice! I can't wait for you to see the results. You'd never know this boat was under water with pumps assaulting the woodwork for 7 hours or so, not by the woodwork, at least! Mrs. G, thanks also for the organizational help and advice. We can't make a little boat into a big boat, but we can make it feel a little less little.

Many of these projects were first-time projects. We'd never messed with the stuffing box before, or refinished teak before, or worked with epoxy and fiberglass before. In that light, it is no wonder a few days were, shall we say... difficult. It is also no wonder my Starbucks bill climbed considerably. Nothing in the world comforts me better than a trip to my favorite off-the-boat spot. Most days I didn't even feel guilty about it!

It's also no wonder we're both getting a little anxious to get out of here!

Thursday, June 24, 2010

Muffler repair

We're one step closer to having a less leaky boat after Maxx and I pulled out and patched up the muffler. It was much less onerous than I had imagined it might be, although the state of the muffler as a whole is not particularly encouraging.

I began to suspect the muffler, or at least some part of the exhaust system, was leaking when I noticed on our last trip up to Port Townsend that we were taking on more water while under power than under sail. The water was clearly coming in from the stern, since I could see it dripping down near the prop shaft (itself which, since I could see it, and see no water coming in there, was a likely suspect early eliminated), but my only known problem back there at the time was the rudder shaft, which should leak the same amount regardless of the means of propulsion (it's true that the hull squats more in the water, increasing the pressure and therefore the leak rate, the faster we go, but the amount of squat for 5 knots under power is the same as 5 knots under sail, more or less).

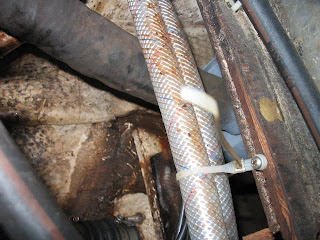
So, since it was associated with the engine somehow, and I could see the entire intake side of the engine cooling system, I deduced there was a leak in the muffler. This seemed like bad news, because you can't even see the muffler in its normal installation; it is tucked away beneath the fuel tank, and even with a mirror and flashlight cannot be inspected in place. It's that light grey thing at the end of the black exhaust hose in the picture there.

Fortunately, it proved to be easy to remove. We un-clamped the hose forward from the exhaust mixing elbow off the engine, pulled the muffler out by the house from behind the fuel tank (an area relatively easily accessed from the starboard cockpit locker) and then freed it from the rest of the discharge hose.

Sure enough, there was a hole. Assuming this would be the case, and knowing that a new muffler or a full-on repair wasn't in the budget this year, I had purchased some muffler repair tape in preparation. Unfortunately, the tape assumes a hole somewhere in the body of the muffler where it can be securely wrapped; this was a hole in the join between the body and the end.

Fortunately, Maxx owns a wire-feed welder, and even more fortunately, this welder is stored in our friend Torrey's garage, which is just up the road here in Ballard. We zipped over there and after a lot of cursing and four or five tries, Maxx got it back to watertight status. For good measure, we gave the thing a coat of engine paint to help ward off further corrosion. The metal is thin and pitted, so it's a temporary solution, but it should hold up for the rest of this year, at least. I haven't been able to try it under pressure yet; there was still a puddle back there and since I can't watch the muffler itself, I wouldn't be able to tell if water draining forward was coming freshly out of it or just from what is already there. After it dries out a bit I'll be able to test it.

We had also planned to pull the rudder packing nut and check the packing on that again, since it was dripping coming back from the haul-out, but when we checked on the post, it was bone dry. I was not under the impression that flax needed to "take up" as they say with wooden vessels, but I'm firmly in the "if it ain't broke, don't fix it" camp so if it isn't leaking now, I'm not going to tear it apart and risk introducing a leak again. It could be that it's simply dry while we're stationary because there isn't any pressure (see above regarding "squat") but it could also be that it simply took some time to take up and squeeze in tight enough against the shaft to keep the water out. I'll find out for sure next time we get under way.

Saturday, June 19, 2010

What's YOUR favorite f-word

Really, this is completely innocent.

It isn't uncommon for me to be looking up phonics stuff online. Even though most of my students are adults who know basic spelling/pronunciation patterns, some of them are missing things here and there. Today I was searching phonics patterns for the f sound to see if more than f and ph exist as common spellings. I came across a worksheet made for kindergartners. It had the standard upper case and lower case letter f for their little hands to trace, then continue to copy along the dotted line. Below that were pictures in bubbles of objects that start with the letter f: five, fish, flower, frog, and the like.

At the bottom of the page, just above an empty bubble, in what I assume is standard text for all the letters of the alphabet, are the instructions, "Draw your favorite f word."

I might draw a faucet.

:)
Mandy

Friday, June 18, 2010

The faucet that kicked my a**

In the past few years, I've thought of myself as not a bad plumber. Maybe not a good plumber, but not a bad one. Give me some barbed fittings, plastic flexible hose, and a few clamps and I could hold my own. In the five years we've had the boat I've replaced much of the existing hose, the head sink, and added a hot water heater. So, when the galley faucet started dripping last week, I offered to take on the project, and Scott happily agreed that it was a good idea.

I was actually glad the galley faucet finally created a reason to be replaced. It had a high spout, which is nice, but it also only barely reached over the sink. That's an odd flaw, since the one of the main jobs of a faucet is to direct water eventually down a drain. Every time (yes EVERY time) something was washed in that sink, as much water went behind the sink as in the sink.

I started in the same place I started when the head faucet needed replacing, the aisles of Home Depot. However, the great HD did not offer a suitable replacement. I went as far as to buy a regular bathroom faucet and bring it to the boat (since normal kitchen sink faucets don't use the 4"oc water supply posts). The new faucet looked odd and was quickly returned to Home Depot. I was thrilled to find an equally priced bar faucet from Overstock.com, and it arrived a short three days later. I opened the box, pleased.

As soon as I began the project, I remembered all the irritation of replacing the head faucet about four years ago. Nothing on this boat is accessible, especially the backs of sinks. I finally resorted to cutting the head faucet off with a hacksaw.

The galley faucet was equally unwilling release the adapter that connects a house faucet to boat flexible hose as the head faucet had been. We have better tools now, so this faucet got cut free with a Dremel. This would have been faster than the hacksaw, except the Dremel needs to be recharged frequently and does not have the oomph to cut through the upper sides of two supply lines (the only side we could reach) in a single charging. Still it was easier, as well as apparent that the evening project was now going to be a 2-day project.

Once the old faucet was off, the actual tightness of the undersides of the galley faucet became known. There is about a 2" space between the sink and the backside of the cabinet beneath the supply line posts coming down from the faucet. The adapters need to be screwed onto the posts, but there is no way to get a tool in there for assistance. So, by lack of any other option, it was merely hand tightened (by my weak hands). Not to mention that I thought I'd be smart and have the hose already attached to the adapter so I wouldn't need to mess with trying to tighten the hose clamps in the tiny space... except that the space is too tiny for the hose to spin around with the hose clamps already in place. So the clamps had to be loosened and pulled out of the way.

After hand tightening the adapter to the faucet-side supply lines as much as possible, the hose clamps were slid back up and tightened as much as possible with assistance from multiple different sized screwdrivers. Diverse curses and groans of varying pitches and amplification and a few cuts and band aids later, I re-pressurized the system, not actually confident that it would not leak. And leak it did. Cranking my head around, flashlight in sore hands, I could see the water coming from above the adapter.

Again, the adapter couldn't be tightened while the hose clamps were in place. So, off with the clamps, and while I was at it, off with the hose as well. No sense having that in my way. I mustered all the strength I could to get the cold water adapter off and replaced the Teflon tape, and screwed it back on again. The hot water I couldn't get back off, my arms and hands apparently having lost strength since connecting it hours earlier.

The next steps: Put the hoses back on, get the clamps back in place, turn the water back on, and try to identify where the drips are still coming from. Happily, it seemed the new drips came from above the hose, but not above the adapter. My additional cranking on it did some good, somehow. I hoped that tightening the two sets of clamps, screws opposite each other, may fix the drips. Except it didn't. Both hot and cold still let out a drip every few seconds. I've heard that over-tightening hose clamps can also cause a drip, since it can open up a gap near the flat screw area. But, given how difficult it was to get a screwdriver into the space, too tight seemed unlikely.

About 6 hours after starting that morning, I cried uncle. My arms hurt. My hands had been jammed by the screwdriver more times that I know. I called Scott back to the boat, saying I'd done my best, but the faucet had kicked my ass.

Being diplomatic, he tried to convince me that not all of my time that day had been a waste. I still can't see how that can be true, since the first thing he did was completely remove the entire thing and start anew. The best I can think I did was supply him with an actual example of how it would all look when it was put together again.

It was time for me to teach, and he had the project to himself. By the time I was finished, so was he, looking nearly as beaten back as I felt. But he'd gotten closer to the goal of a new faucet that does not drip below the sink. Closer to a non-dripping faucet connection isn't an acceptable final outcome, and it seems drips slowly continued to fall. With everything quite wet by this time though, it was hard to tell what was new water and what was old.

We put everything back under the sink, since there is no place to put that stuff while we wait for everything to dry. I made dinner, and afterward laughed at the habits I saw had been in place for containing the water in the sink during the process. At least the new faucet does what it is intended to do. It turns on; it turns off; it releases water over the cavity of the sink and not along the perimeter of it. That's something!

Tonight, or maybe tomorrow, we'll take everything out again for a close inspection of possible drips.

Scott has taken a more philosophical reflection of the day in his Late Entry post, The Rules. After reading it, I thought back to the day I replaced the head faucet. No, it wasn't a day. It was three, possibly four days. I'd cursed, I'd probably cried, I'd asked for help, and it was eventually in place. And for all the years since I've just used it, happy that it existed, forgetting the trouble that got it there.

Hopefully this new chrome will bring me as much worry-free use. And all shiny and new, it sure is pretty!

~Mandy

Saturday, June 12, 2010

The First Day of Summer

Today is the first day of summer we have had here in the Puget Sound region. I know it's not really even officially summer yet, but there is often a point some time in the spring where you have a day that is basically a summer day, and from that point forward I think of summer as having begun. If subsequent days return to more spring-like weather, I just think of it as a crappy summer, rather than a normal spring.

We were having a normal spring up through yesterday, which means rain and sun breaks, but mostly rain, and that was a shame because I had to have our cat Rosie put to sleep yesterday, and she very much would have enjoyed a few hours laying around in a warm puddle of sun before she had to go.

Rosie has been living at my parent's place in Port Hadlock since we moved aboard our boat last summer. Diagnosed with a chronic condition just as we were getting ready to move, we didn't feel right just giving her to someone else. But she had perked up quite a bit after we moved her there and didn't show any signs of moving on from her ninth and final life anytime soon.

We spent the winter with her while my folks were out traveling. She seemed to be normal, happy, and healthy, but toward the end of our stay she was sometimes forgetting to go outside to go to the bathroom, and she was sleeping a lot more than usual... pretty typical old cat behaviors.

After we left, though, she was eating less, forgetting to go outside more, and sleeping even more often. When we went back up last week for our haul-out in nearby Port Townsend, we were shocked at how skinny she had become. As long as someone remembered to put her outside in the morning and evening she would go to the bathroom out there; otherwise, she was hitting the living room carpet more often than not.

So it wasn't like there weren't signs that she was deteriorating, but she was so small that it doesn't take long for things to go downhill seriously if she hits a tipping point of some sort. After we sailed back to Seattle, she pretty much stopped eating and drinking entirely. She stopped sleeping in her favorite spots and instead camped out in a corner of the living room behind a potted plant. So, after a phone call from my mother not a week later, I drove back up on Friday to see her for myself and take care of the necessary arrangements.

We made an appointment to have someone come out and do it at home on Saturday, since she has always hated car rides and I wanted her to be in comfortable surroundings and not stressed out at the end, but once I saw her it seemed clear that wasn't going to be a factor. She was just listless and generally unaware of her surroundings, although she did purr a bit in the morning when I got there and petted her.

But she wasn't getting around well, even when she tried. When she showed some signs of interest in the water bowl, I put it right under her snout but after sniffing at it, she just lay down right there with her head on top of it. She wasn't feeling good, and I didn't want her to feel like that for another day.

Mandy kept urging me to take her outside and let her lay in the sun or play or just feel free, but it was really pretty crappy outside. It cleared up in the afternoon. In fact, it was miserable when we went into the vet, and sunny and clear when we came back out, which just seemed cruel.

She barely objected at the car ride. It was like she seemed to know that she shouldn't want to be in the car, but it turned out not to bother her once she was there. I just held her in her blanket on my lap. She meowed half-heartedly for a few seconds and then just lay there. The vet is only about two minutes away, so it wasn't much of a ride.

I was very pleased that the vet who was there happened to be a friend of my parent's, who had been at their house and knew Rosie, and she him. I think, though she was zoned out from pain meds that we gave her before we even left the house, that it helped that everyone in the room at the end were friendly people that she knew. She was a very sweet, sociable cat.

One of the assistants at the vet said that typically, calicos are the redheads of the feline world, very temperamental (I knew exactly what she meant!) but Rosie had, in the time that we had her, become very much a people cat. She liked people and they liked her. When we first brought her home from Spokane, we didn't see her for a week. She spent all her time under our bed or dresser. But gradually, she warmed up to us, and when our other cat, Hobbes (previously deceased), wasn't hogging all the attention, she would sit on us or with us wherever we happened to be.

She was also the better mouser of the pair, that being the ostensible purpose for introducing the cats to our house in the first place, quickly clearing it out. Later, she would get bored and from time to time catch a mouse or bird outside and bring it IN, which wasn't exactly what we had in mind. But she was well-behaved and good with adults and kids alike.

She loved finding a patch of sunshine and zoning out for her mid-day naps there. Which is why it is so hard, now, that this is the first day of summer. There are puddles of sunshine all over the place, but no Rosie. She was a good cat, and she deserved her sunshine. I wish I could have given her one last day of it. I don't know how her day would have been today, or her night last night, and there is some part of me woke up this morning relieved that she was not still out in her corner too weak to hold her head up. I'm glad to have spared her more of that. But I can't keep from looking around and thinking it would have been a little bit better for her if I could have found her some sun before having her put to sleep.

It would be poetic to say that I had buried her in a place with a nice patch of sunshine, but instead I picked a spot on the bluff near my parent's house (adjacent to, but not within, the previously established chicken graveyard) with a view out over the water, and some nice weeds to hide and play in. She loved to stalk. And for the past year, one of her favorite spots has been up on the back of a chair where she can look out over the bay. But there was not sunshine there, either. So I figured she would appreciate the view more. I hope so.

She was our friend.

Thursday, June 10, 2010

BPrepared


Logomyway.com is sponsoring a logo contest for a new British Petroleum logo. Clever, clever artists who are also clever with words and acronyms have submitted entries. I sent a tweet to our webpage logo designer that she should also enter.

~Mandy

Tuesday, June 8, 2010

We're bad luck for planes

This makes three crashes or forced landings we have overheard while underway in the past three years. Of the other two, one was off Anacortes and the other near Shilshole. We were about ten miles away from this one, which is about two hours for us under power, so like the others, we just listened. It wasn't clear at first from the Group Seattle pan-pan that it was a float plane; when the first yacht on-scene called in (and they got to them within about fifteen minutes, pretty quick) and said the pilot was looking for a tow, we figured it probably hadn't been too bad.

Saturday, June 5, 2010

Haulin'

This year's haul-out has come and gone remarkably quickly considering we did it over three days instead of our usual thirty-hour turnaround. Still, I didn't feel like I had time enough to post anything, or even to take any pictures, although looking back I can't see what might have been so urgent. Yesterday, the day we splashed, for instance, I spent several hours simply sitting around waiting for paint to dry after everything else was all done. We even went back in the water early, a boon to the always professional, always fun yard workers at the Port Townsend Boat Yard... it being Friday, an early splash time on the last scheduled boat of the day, which we were, means an early weekend!

I had so much spare time because I wasn't sure what sort of shape the keel might be in after a close encounter with a rock in Montague Harbour earlier this year. Based on previous experience, it felt like it might have done a fair piece of damage, gouged some lead out, perhaps even damaged the hull above. So I booked a day in the middle, anticipating some real work banging it all back into shape.

During the actual hauling out, I am still on board the boat (yes, it's a pretty strange feeling when you're standing on deck and 7 tons of boat starts to take off like a helicopter) and so when the underside comes clear of the water for inspection, I can't see a thing. So all I could do was watch everyone else watching it and to try to judge from the looks of horror exactly how bad it might be. There were no obvious gasps or cries as it came out, but there was an ominous hush among the spectators which I took to bode ill.

When I stepped off and looked for myself, though, I got a pleasant surprise... some paint and epoxy had come off at the bottom of the fin, but there was hardly any lead damage, and it was all confined to a patch about four inches at the trailing edge of the keel. Why the trailing edge? We were in forward when we hit... I assume that most of the trouble came from getting off again. Conventional wisdom, in fact, is that once you are hard aground, it's better to stay there and refloat on the tide than to try to get a pull off. Our luck with that technique hasn't been so great, though, so I am fine with the decision we made to get yanked off quickly rather than waiting around.

Anyway, it took very little epoxy and fairing to get the keel back in shape, and most of it was done by the end of the first day. That day was a little windy to be painting, anyway; my friend Maxx and I had sailed up making hull speed on only a little scrap of unfurled jib, and all those powerful winds continued to hammer right into the yard after we arrived.

The next day was calmer and sunnier and dry enough for me to get 1.5 coats of paint on; I did a double-thickness with extra coppery paint near the waterline, where most of our fouling problems are. That said, the existing bottom job looked pretty damn good considering it had been in the water three years: the sprayers took off most of the crud, and the only barnacles were on the prop shaft and at the bottom of the rudder. The prop shaft zinc was missing, too... not sure at what point that might have come off but there was corrosion and pitting on the prop and strut, which isn't good. This year, in addition to putting a fresh zinc on, we put on a couple coats of a zinc spray paint which is supposed to help protect against both growth and corrosion.

While I painted, my stepfather did most of the epoxy and fairing work, my mother waxed and polished, and Maxx and Mandy worked on the other big project on the schedule: repacking the rudder stuffing. On and off, that took the better part of the first two days, but Maxx also found time to clean and paint the engine (at least, such parts of the engine that can be reached without taking it out entirely) and Mandy waxed and buffed the hull above the waterline. Some gouges and scratches in the gelcoat at the bow also got fixed up.

Everything ended up looking very nice and clean when all was said and done. I had two major disappointments, though. One, the radar, which had been acting up for more than a year and finally quit completely last summer, remains out of commission despite a rather lengthy trip up the mast to check the circuits and re-seat connectors and such. Whatever is wrong with it, it's more complicated than I can figure out, which likely makes it expensive to fix. Two, the rudder, despite being repacked, still leaks. I will have to tear that back apart in the water, possibly weighting the bow to raise the shaft above the waterline. I have some idea what might have gone wrong there, but won't be able to look at it for a couple weeks.

We also think that the muffler is leaking now; we make a lot of water underway, and I can see that the prop shaft is not leaking, but what is coming out comes out from near the front of the muffler. It's impossible to see the muffler itself, which is wedged in under the fuel tank, but it will probably have to come out for further examination at some point soon.

We basically came out of it having checked everything I wanted to check, but with only about half of it actually successfully addressed. Nonetheless, I feel better about it all than I probably should with that poor a track record, simply because the worst that might have come up, a major keel repair job, never materialized, and that was enough a relief to make up for the other disappointments.