I began to suspect the muffler, or at least some part of the exhaust system, was leaking when I noticed on our last trip up to Port Townsend that we were taking on more water while under power than under sail. The water was clearly coming in from the stern, since I could see it dripping down near the prop shaft (itself which, since I could see it, and see no water coming in there, was a likely suspect early eliminated), but my only known problem back there at the time was the rudder shaft, which should leak the same amount regardless of the means of propulsion (it's true that the hull squats more in the water, increasing the pressure and therefore the leak rate, the faster we go, but the amount of squat for 5 knots under power is the same as 5 knots under sail, more or less).

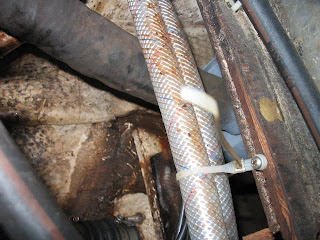
So, since it was associated with the engine somehow, and I could see the entire intake side of the engine cooling system, I deduced there was a leak in the muffler. This seemed like bad news, because you can't even see the muffler in its normal installation; it is tucked away beneath the fuel tank, and even with a mirror and flashlight cannot be inspected in place. It's that light grey thing at the end of the black exhaust hose in the picture there.
Fortunately, it proved to be easy to remove. We un-clamped the hose forward from the exhaust mixing elbow off the engine, pulled the muffler out by the house from behind the fuel tank (an area relatively easily accessed from the starboard cockpit locker) and then freed it from the rest of the discharge hose.
Sure enough, there was a hole. Assuming this would be the case, and knowing that a new muffler or a full-on repair wasn't in the budget this year, I had purchased some muffler repair tape in preparation. Unfortunately, the tape assumes a hole somewhere in the body of the muffler where it can be securely wrapped; this was a hole in the join between the body and the end.

Fortunately, Maxx owns a wire-feed welder, and even more fortunately, this welder is stored in our friend Torrey's garage, which is just up the road here in Ballard. We zipped over there and after a lot of cursing and four or five tries, Maxx got it back to watertight status. For good measure, we gave the thing a coat of engine paint to help ward off further corrosion. The metal is thin and pitted, so it's a temporary solution, but it should hold up for the rest of this year, at least. I haven't been able to try it under pressure yet; there was still a puddle back there and since I can't watch the muffler itself, I wouldn't be able to tell if water draining forward was coming freshly out of it or just from what is already there. After it dries out a bit I'll be able to test it.


We had also planned to pull the rudder packing nut and check the packing on that again, since it was dripping coming back from the haul-out, but when we checked on the post, it was bone dry. I was not under the impression that flax needed to "take up" as they say with wooden vessels, but I'm firmly in the "if it ain't broke, don't fix it" camp so if it isn't leaking now, I'm not going to tear it apart and risk introducing a leak again. It could be that it's simply dry while we're stationary because there isn't any pressure (see above regarding "squat") but it could also be that it simply took some time to take up and squeeze in tight enough against the shaft to keep the water out. I'll find out for sure next time we get under way.
No comments:
Post a Comment